Alert section
This Document Explains the creation and usage of alerts. There are 2 ways one can create alerts, one is from Request>Alert section and second is from ellipses options of any widget in edit mode. Follow below steps to learn the steps to create alert from alert section;
- Login to OPNBI using valid credentials
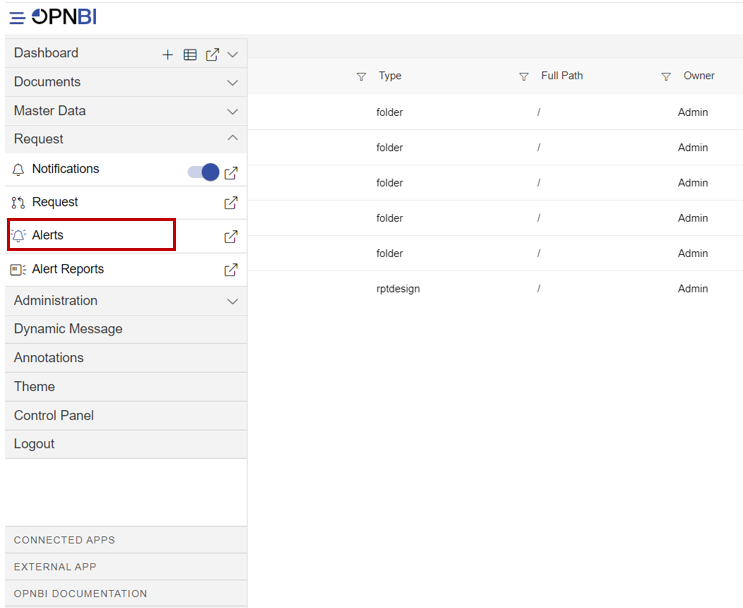
- Go to alert section from Hemberger menu
- You can create alert in 2 ways, from right click context menu and from footer menu,
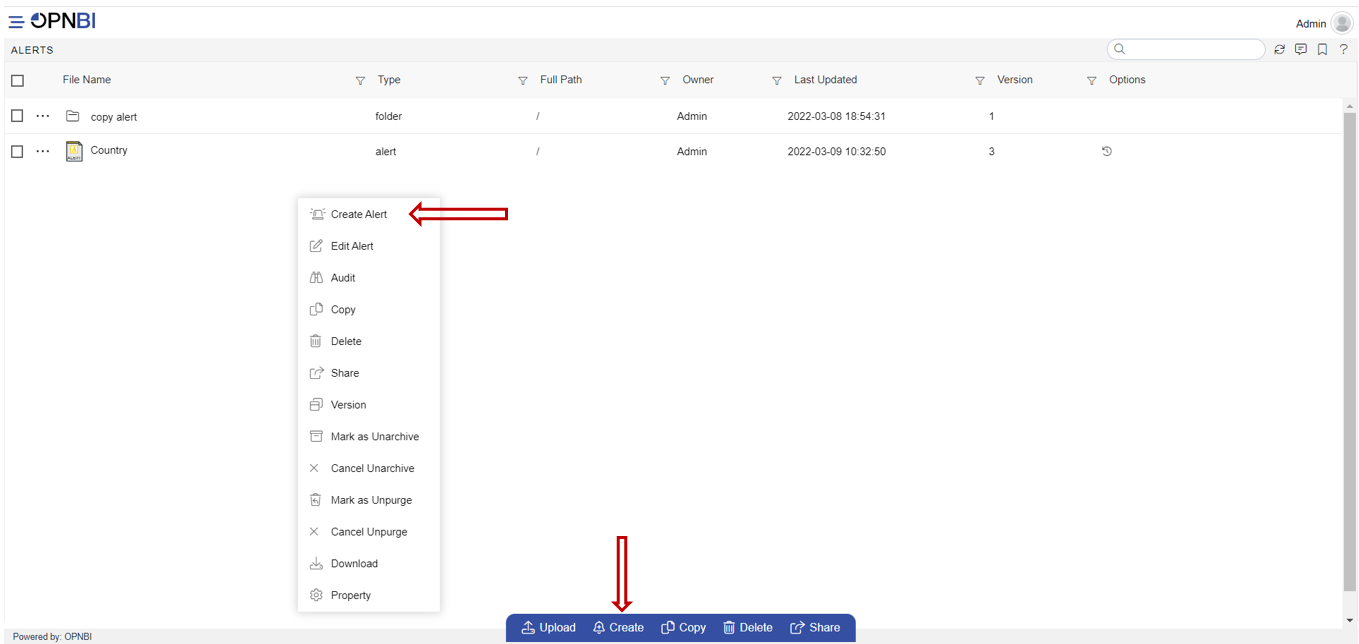
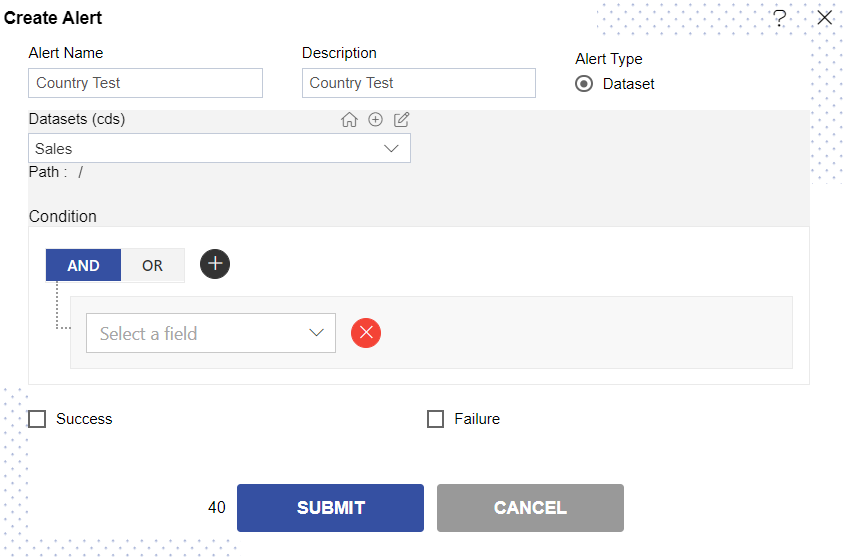
- Click on create alert option from any option and you will see create alert window asking for Alert name, description and Alert type as shown in below image,

- Give alert name : Country Test Description: Country Test And select type of alert you want to create. Right now there is only one option that is dataset. This Type allow user to select on what you want to create an alert. -just select dataset and you will see dataset dropdown is enabled. Select dataset from the dropdown on which you want to apply alert. For Demo we are selecting sales.ds dataset as shown in below image,
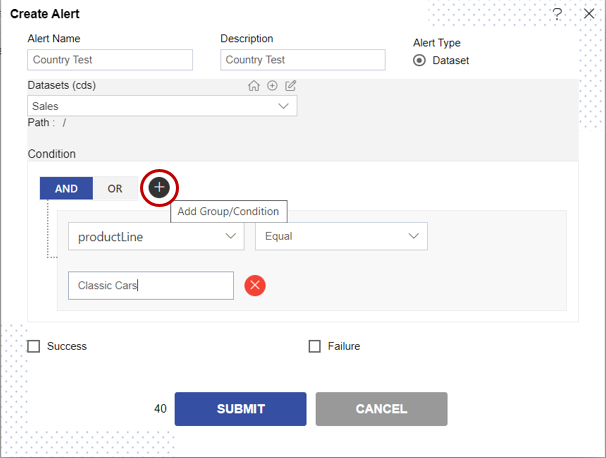
- As soon as you select dataset, condition box will be enabled. So if you want to add some conditions on dataset values you can apply those filters from here. For example, I want to monitor dataset values of product line Classic Cars only so I can apply that condition here as in below image,
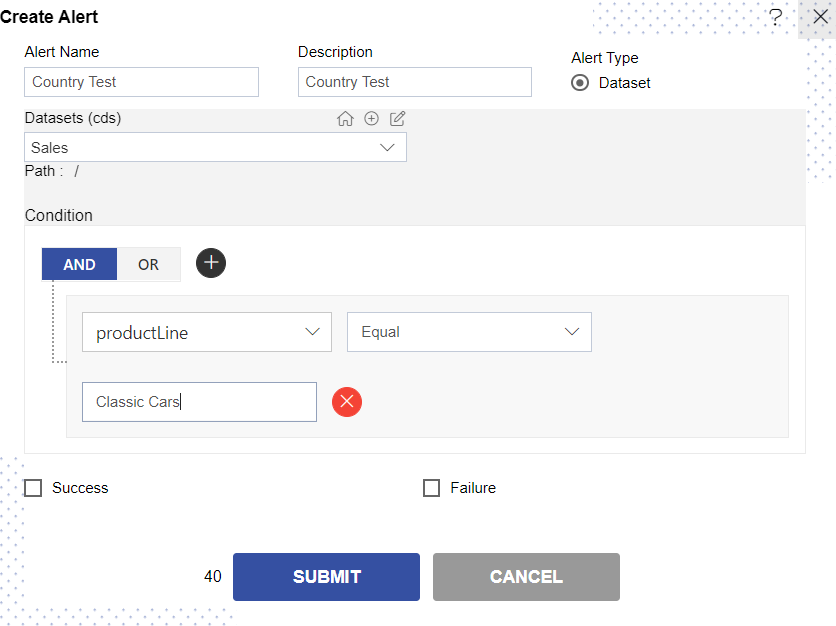
- You can add multiple conditions by using + icon in condition,
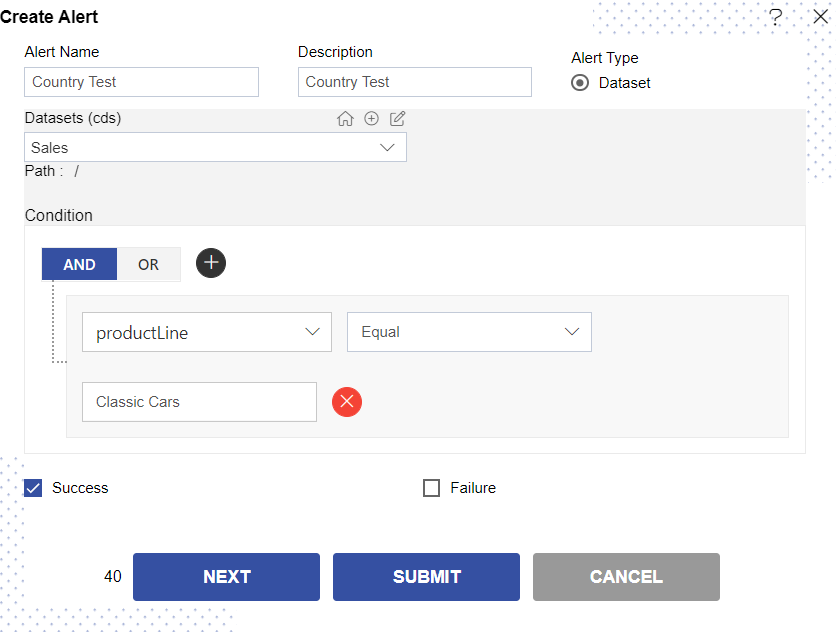
- There are 2 more checkboxes appears at the bottom side one is Success and other is Failure. This option is used when user want to trigger some kind of event when alerts applied on dataset is succeeded or failed due to match not found during scan. For example, here we select event to be trigger on success on this alert match, next button will be available which will take you to event page as shown in below image,
- Next page is event page where user have to select type of event he want to trigger,
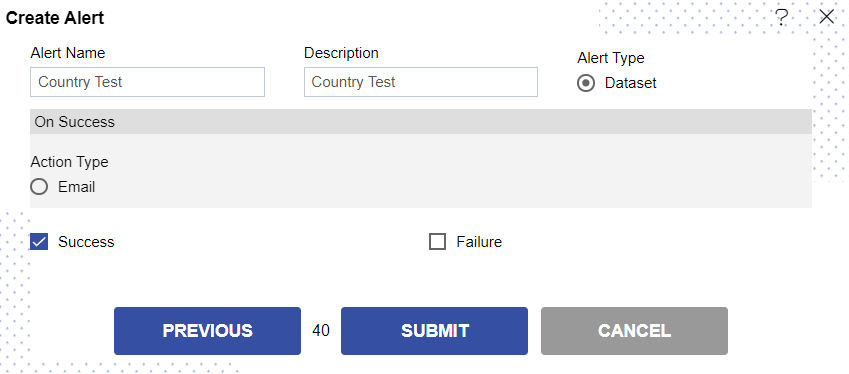
- As of now we have added only email event, so what is will do is when a match case is found, it will trigger email to selected user.
- Click on Email radio button, it will ask you to select users or roles to whom you want to send success email. You can select directly from user or role dropdown If user is available in OPNBI or you can provide the email of user who is not part of OPNBI by writing email in Enter email box and hit enter.
- Next, select Email template
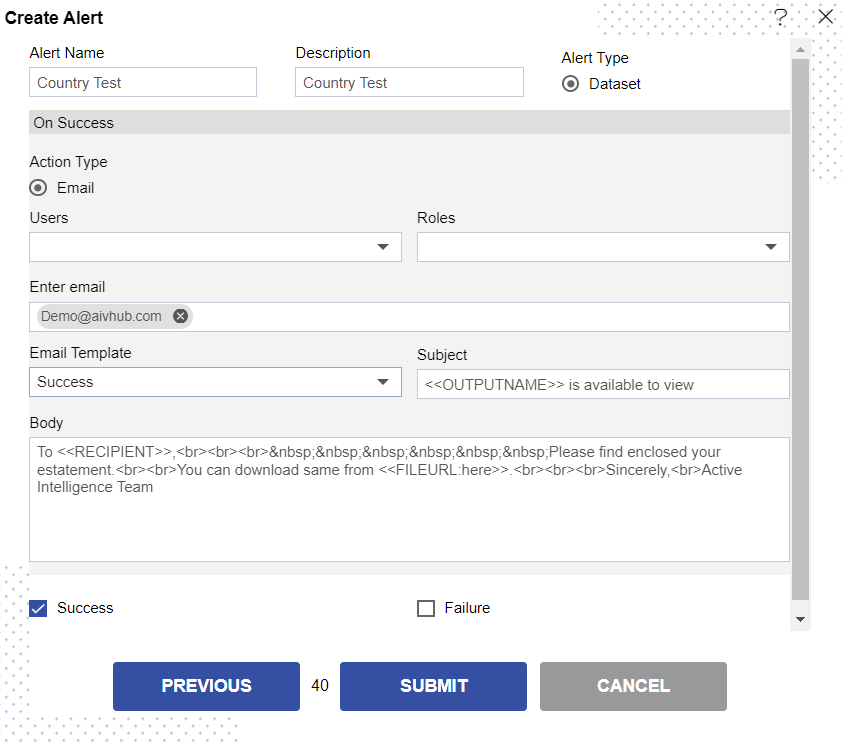
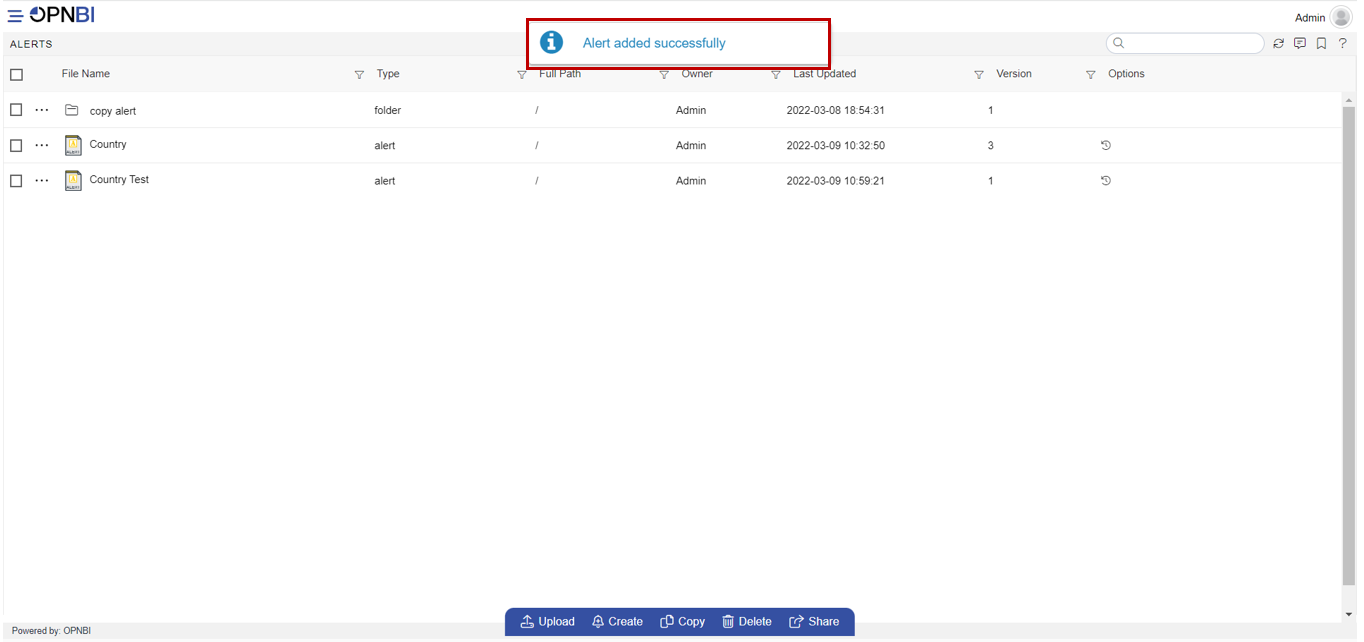
- Click on submit to create alert. You will see Alert Created Successfully message
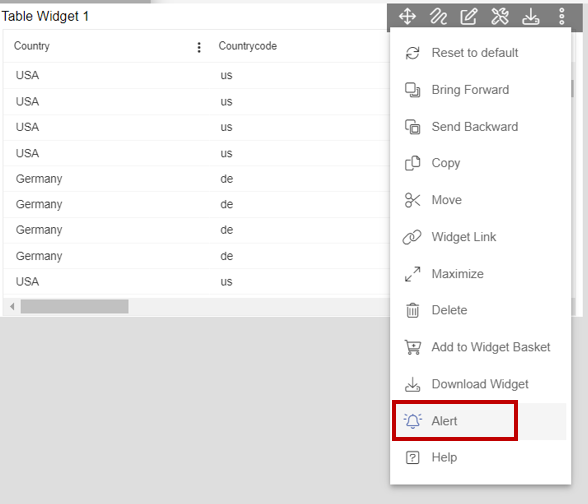
- Another way you can create alert is from ellipses options of widget edit mode
NOTE: Use of this alert is being implemented currently, will update as it is done.